Host a class
After this page you can guide a group through a Cyber Fidget lesson, see their work and choose apps to share. Use it for a school class, library workshop, club, jam or family session.
Open the class join page Try the guided example class
What a class is
Students join at cyberfidget.com/class/ with the class code. They do not need an account. They can also follow the join link you share. The shared screen shows the join address and code for the room.
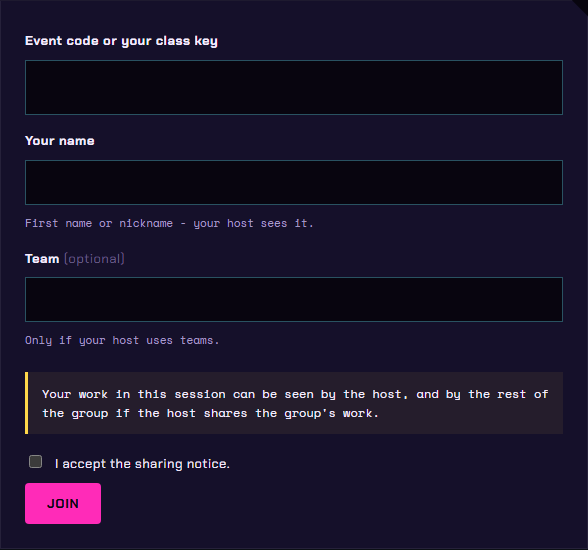
On the join page, students enter Event code or your class key and Your name. A first name or nickname is enough. Team is optional. They read the sharing notice, select I accept the sharing notice., then choose Join.
Each student gets a class space: their own Studio workspace with the lesson steps. Studio is the browser tool for making apps. The host can see everything in the class space.
Inside a class space
The emulator is the on-screen copy of the device. It stays visible while students work, with one REBUILD button directly under it.
Building
- Press REBUILD to turn the student's code into an app and run it in the emulator.
- The build status shows next to REBUILD.
- Builds run in the student's own browser first. If the browser can't build the app, for example an older or unsupported browser, the build runs on the build server instead: the service that turns your code into an app. A count such as N/N left shows the build-server builds left: the first number is how many remain, the second is the total.
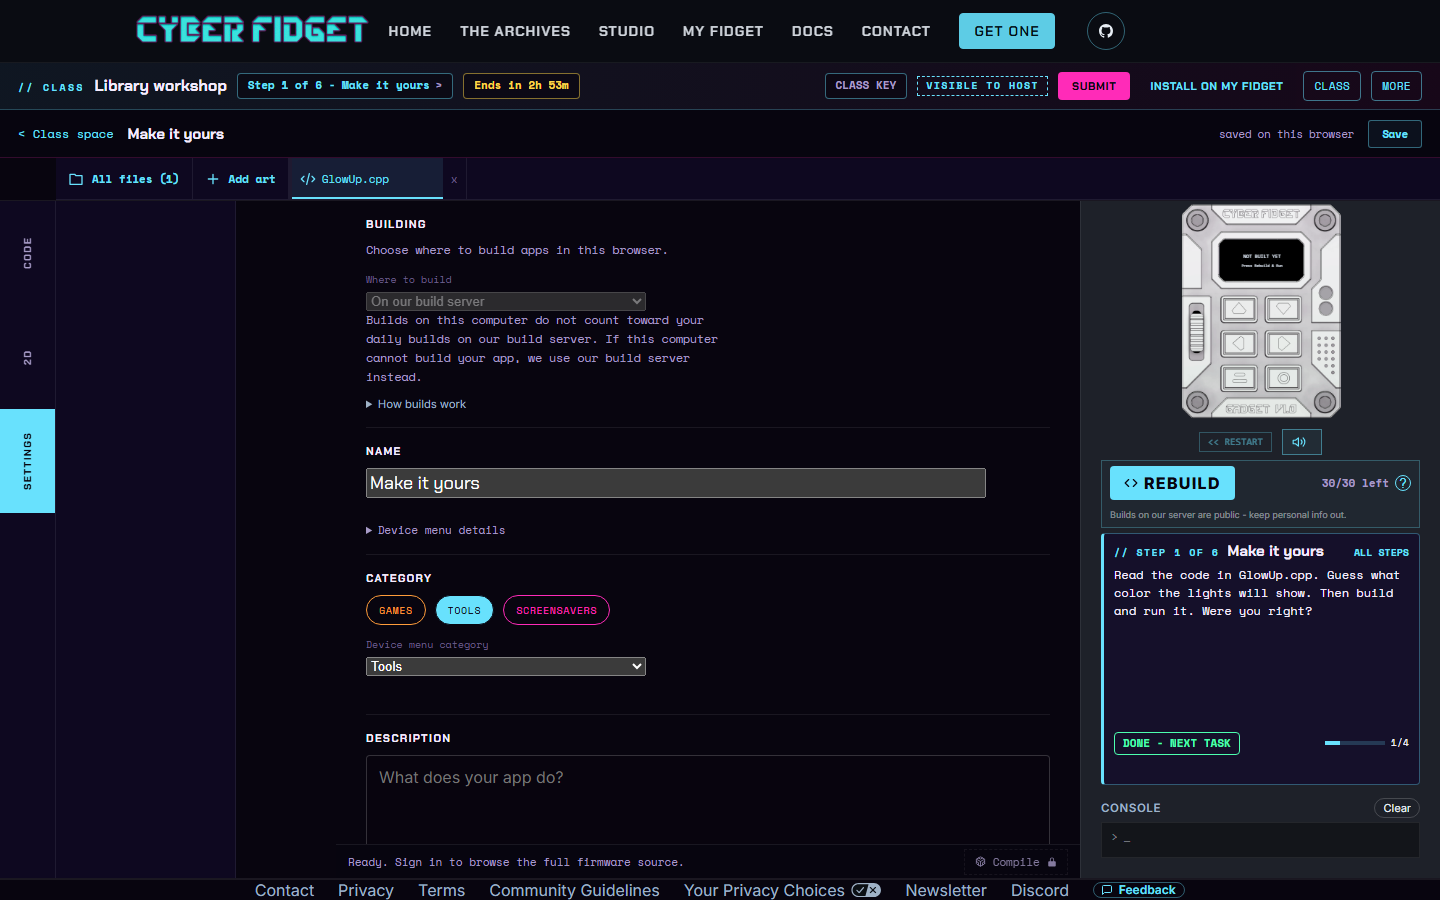
- Press the ? next to the count to open Settings, under BUILDING. How builds work explains where builds run.
- A short note stays in view: apps built on the build server are public, so students keep personal details out of their code.
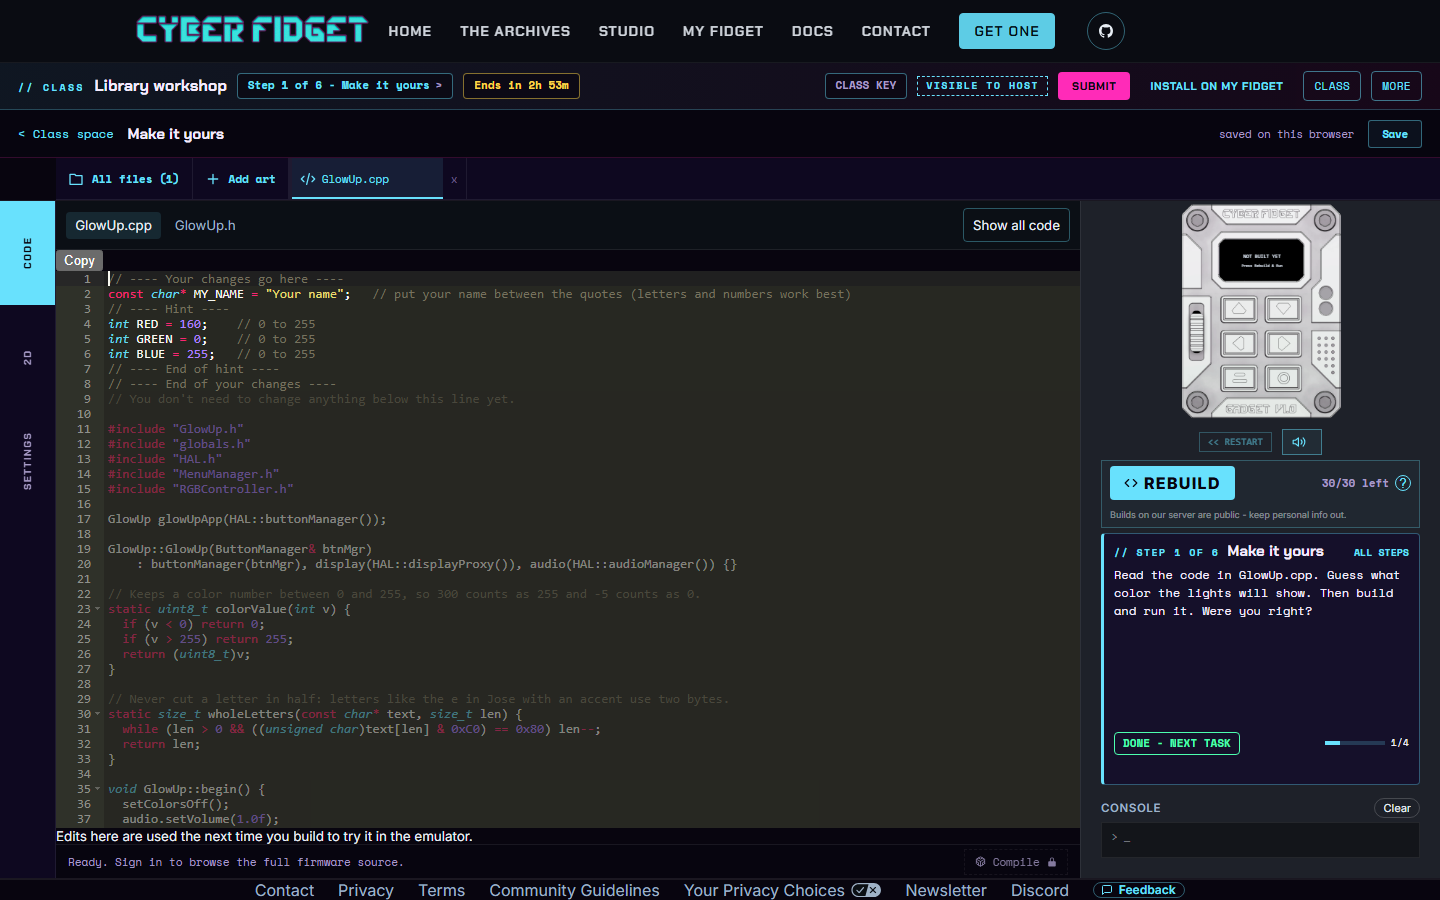
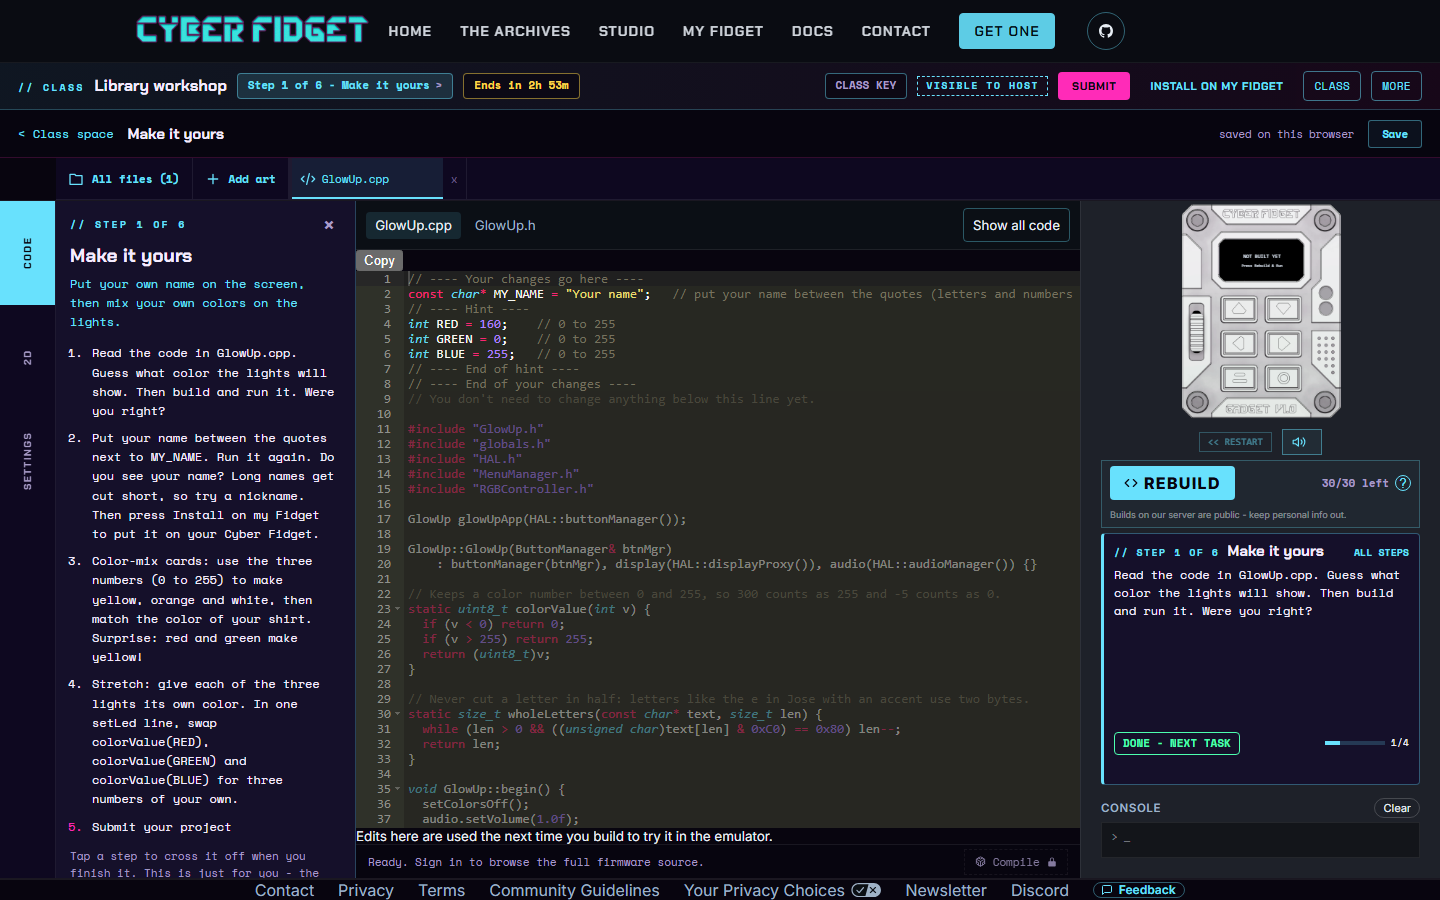
When the steps are open, the class space has three columns: the steps, the code, and the device column with the emulator. The steps column starts closed. Press the step button in the top bar to open or close it, as in this picture. The Console, which shows build messages, is a strip at the bottom. On a short screen the emulator shrinks so everything still fits.
Under the emulator, a task card shows one task at a time. Press DONE - NEXT TASK to move on. A bar shows progress through the step. ALL STEPS opens the full list. After the last task, the button becomes SUBMIT MY PROJECT.
Class key
The class key is the code a student uses to return to their work. The yellow CLASS KEY button in the class bar shows it (on a phone the button reads KEY). After a student joins, a prompt asks them to write the key down. They can use COPY, then press I WROTE IT DOWN when it is written.
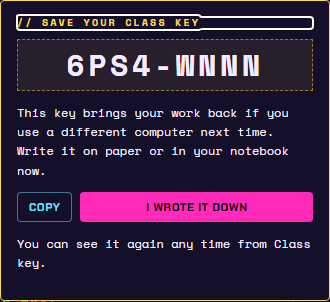
A dot stays on the button until they confirm. Students are reminded again when they leave, and when you end the class while they still have it open.
| Part | What it does |
|---|---|
| Host view | Lets you run the session and see everyone's work. |
| Class space | Gives each student their own work area and lesson steps. |
| Shared screen | Shows the join details, current step or an app you choose on the projector. |
| Lesson guide | Gives the host notes for teaching each step. |
| Show and tell | Lists submitted apps for review and sharing with the class. |
| Class creature game | Combines classmates' creatures into an adventure. Publish editions, collect changes at checkpoints and help students play or install it. See The class creature game. |
| Backup catching game | A net-catching game built from approved creatures, under the closed editions and backup section. |
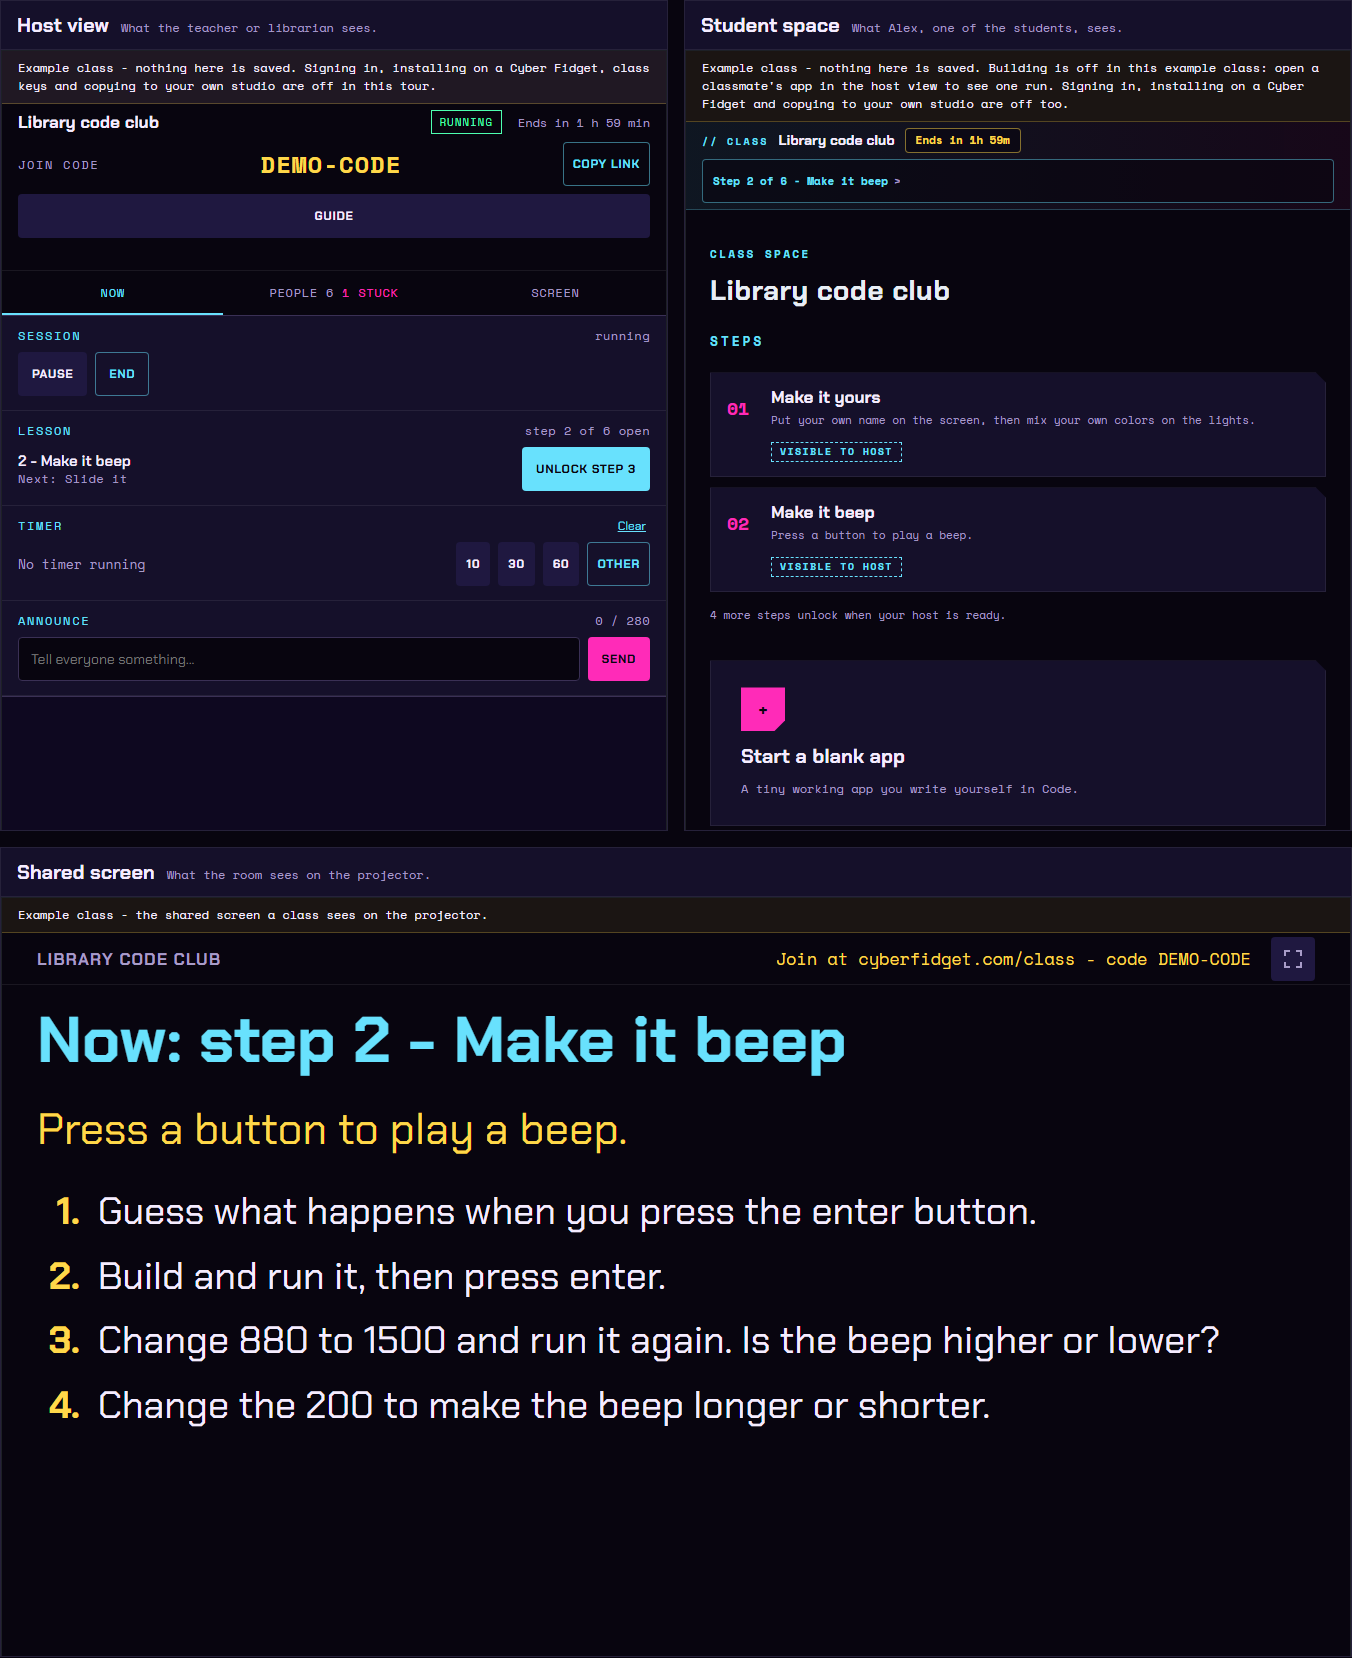
Try it first
The guided example class puts the host view, a student's space and the shared screen together. Nothing in the example is saved. Reloading starts it over.
Try it in under a minute
Step 1 - Unlock the next step
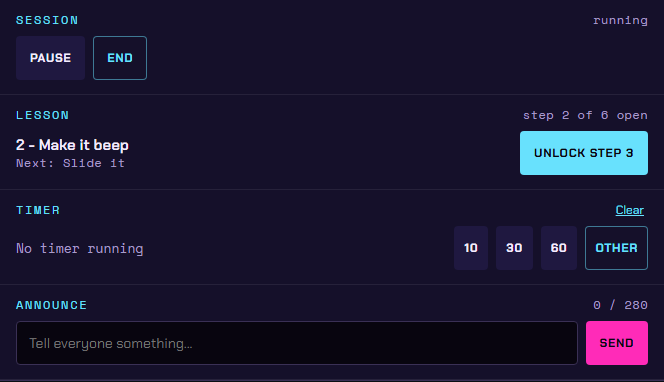
In the host view, press Unlock step 3. A moment later, the student's space has the next step.
Step 2 - Show an app on the shared screen
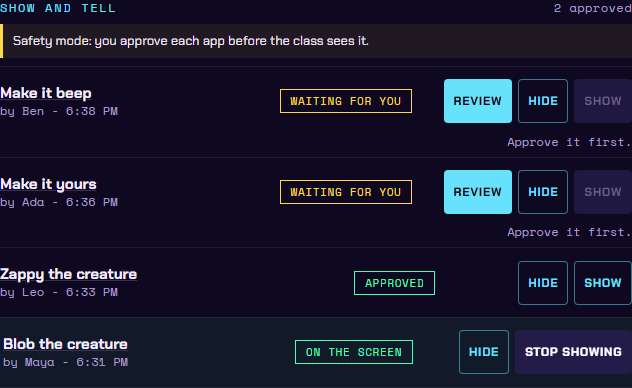
On the Screen tab, under Show and tell, press Show next to Blob the creature. It starts playing on the shared screen.
Step 3 - Send a message
Go back to the Now tab if you moved to Screen. Type a message under Announce and press Send. The student and shared screen both show it. Announce is in the host controls shown in step 1.
While sending, the button reads Sending.... Announcement sent. confirms delivery. If it says Couldn't send the announcement. Please try again., your typed message stays so you can send it again.
Step 4 - Read the lesson notes
Press Guide at the top of the host view to read the lesson notes.
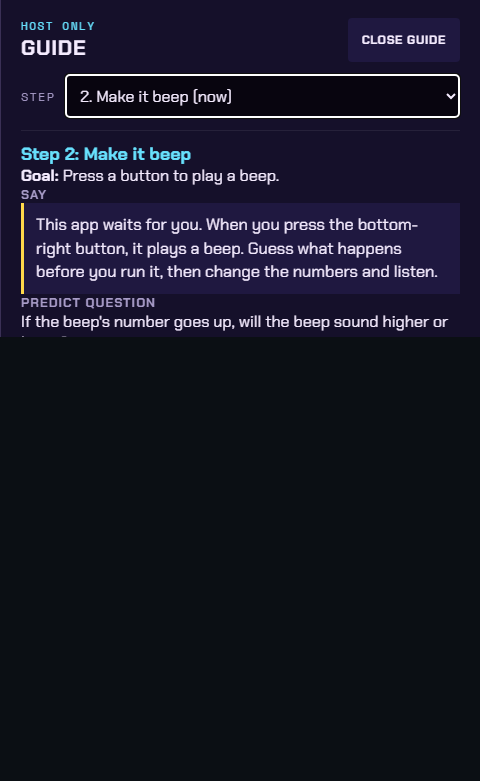
Building apps is turned off in the example. The example includes apps you can show.
On a wide screen, the example shows the host view, the student's space and the shared screen side by side. On a narrow screen, they become Host, Student and Screen tabs, as in this picture.
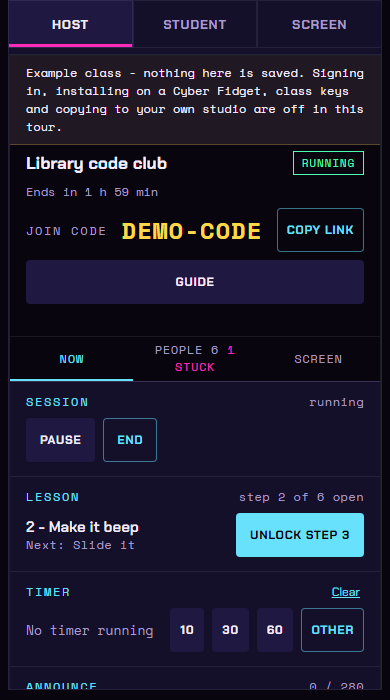
Run a session
Keep the host view on your computer. Let students work in their class spaces.
Set the pace
| Control in the host view | Use it to... |
|---|---|
| Start class | Begin a session that has not started. |
| Pause / Resume | Ask the group to look up, then let them carry on. |
| End | Finish the class. It asks you to confirm first. |
| Unlock step N | Make the next lesson step available to students. |
| Timer | Choose 10, 30 or 60 minutes, or choose Other, enter minutes and press Set timer. |
| Clear (beside Timer) | Remove the countdown. |
| Announce / Send | Show a message in student spaces and on the shared screen. |
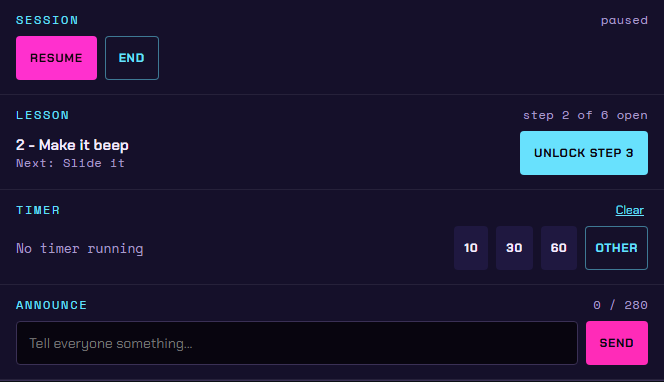
Students see the unlocked lesson steps in their class space. Give them time to try each step before unlocking another.
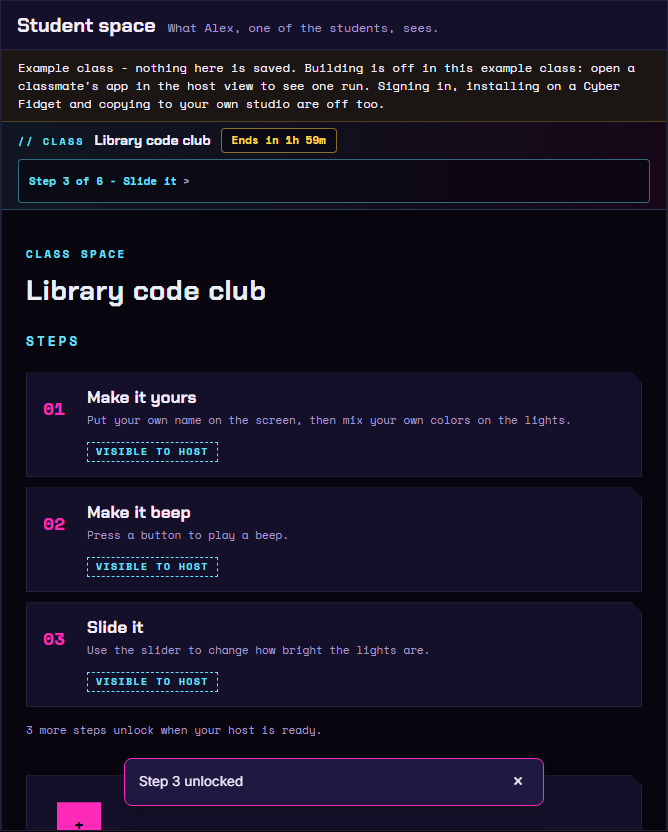
Choose what the room sees
In a real class, choose Shared screen at the top of the host view. Put that window on the projector. Keep your host view on your own screen.
On the shared screen, use the fullscreen button at the right of the top bar (hover to see Fullscreen) to fill the display. Hover over it again to see Exit fullscreen, then choose it to leave fullscreen.
In a narrow window the host view has Now, People and Screen tabs, and Show and tell is on Screen. Use Show on an approved app under Show and tell. Use Stop showing to return to the lesson step, or the welcome view if there is no current step.
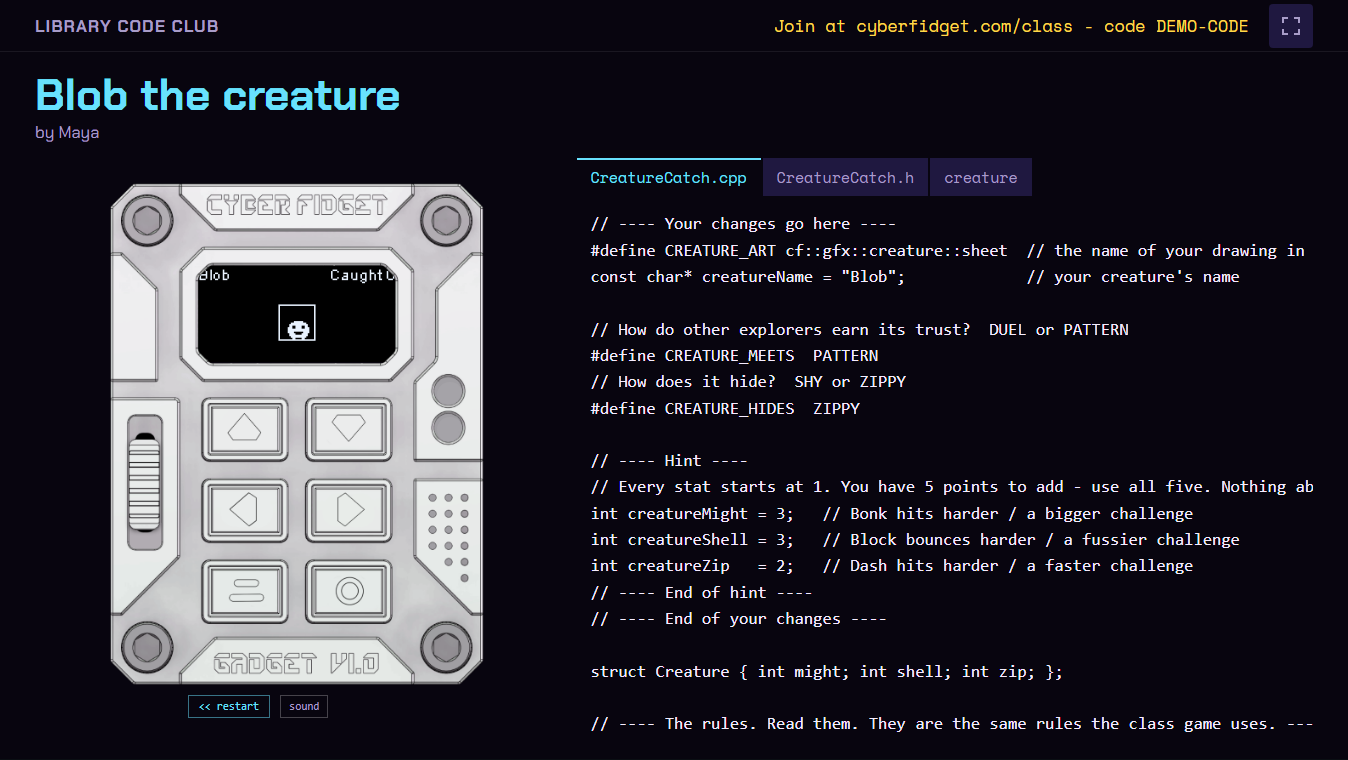
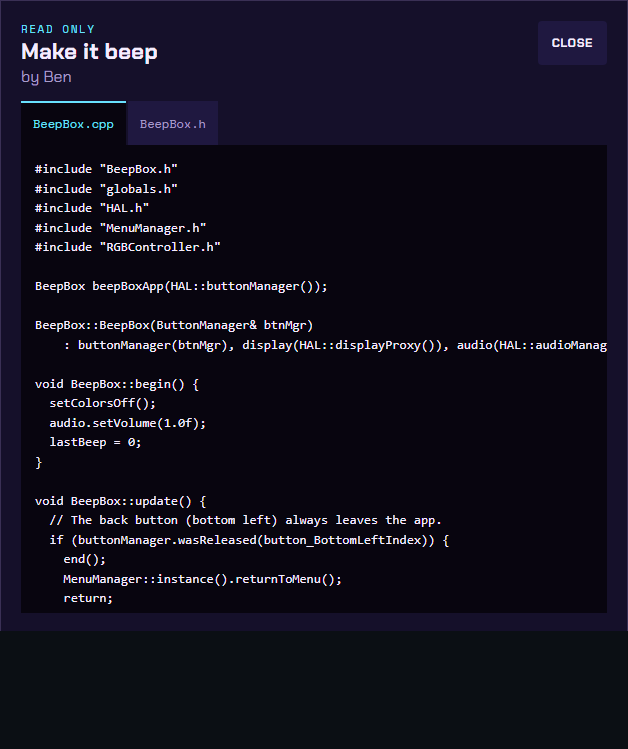
With Safety mode, you approve each app before the class sees it. Choose Review to inspect an app. Choose Approve this version when it is ready to share.
For the creature lesson, Class creature game lets you review creatures, publish numbered editions and collect changes at checkpoints. Students play or install the game from their class page. See The class creature game for the lesson's personality choices and the host's publishing and install controls.
For a catching game, open Editions, taking one down, and the backup game, which starts closed. Under The backup game, choose Build the catching game instead. It uses the same approved creatures without their personality choices and puts the catching game on the shared screen.
Collecting everyone's approved work into one thing the whole room sees together is a good pattern for other lessons too, and hosts are encouraged to use it. Show and tell already works this way for any lesson: students submit apps, you approve them and show them on the shared screen.
Use the lesson guide
Choose Guide at the top of the host view. It appears when the lesson pack has host notes. The guide is for hosts only. It covers what to say, questions to ask and places where students get stuck.
For a real class, choose Class setup at the top of the host view, then Print take-home cards. It opens printable class keys for students to take home. A class key is a student's code for returning to their class work.


Who can host
You need hosting access on your Cyber Fidget account. The Cyber Fidget team can send you an invite code. Without an invite, get in touch through the contact page about your class, club or event.
You can have up to three classes you created that have not ended, including scheduled classes. End one before creating another. Build and spending limits for a class are set by the Cyber Fidget team; hosts can't change them.

GitHub is a website for storing and sharing code. Cyber Fidget uses your GitHub account to sign you in.
Step 1 - Open your invite
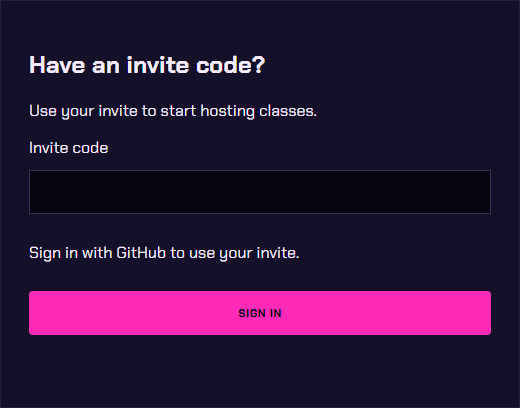
Open your invite link, or open the host page and enter your code in Invite code under Have an invite code?.
Step 2 - Sign in
Choose Sign in if you are signed out. Sign in with GitHub.
Step 3 - Use the invite
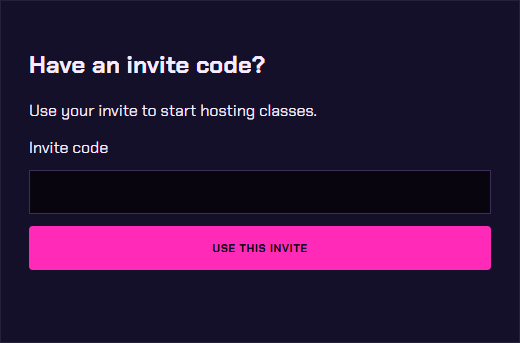
Choose Use this invite to get hosting access.
Step 4 - Open the host page
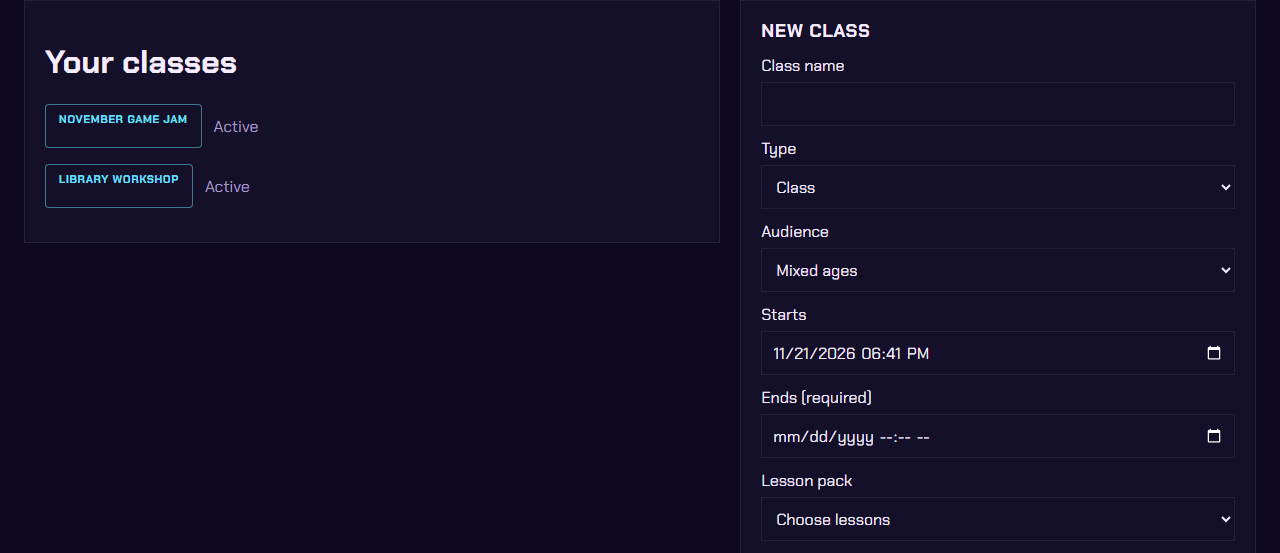
With hosting access, open the host page. It shows Your classes and a New class form.
Step 5 - Create the class
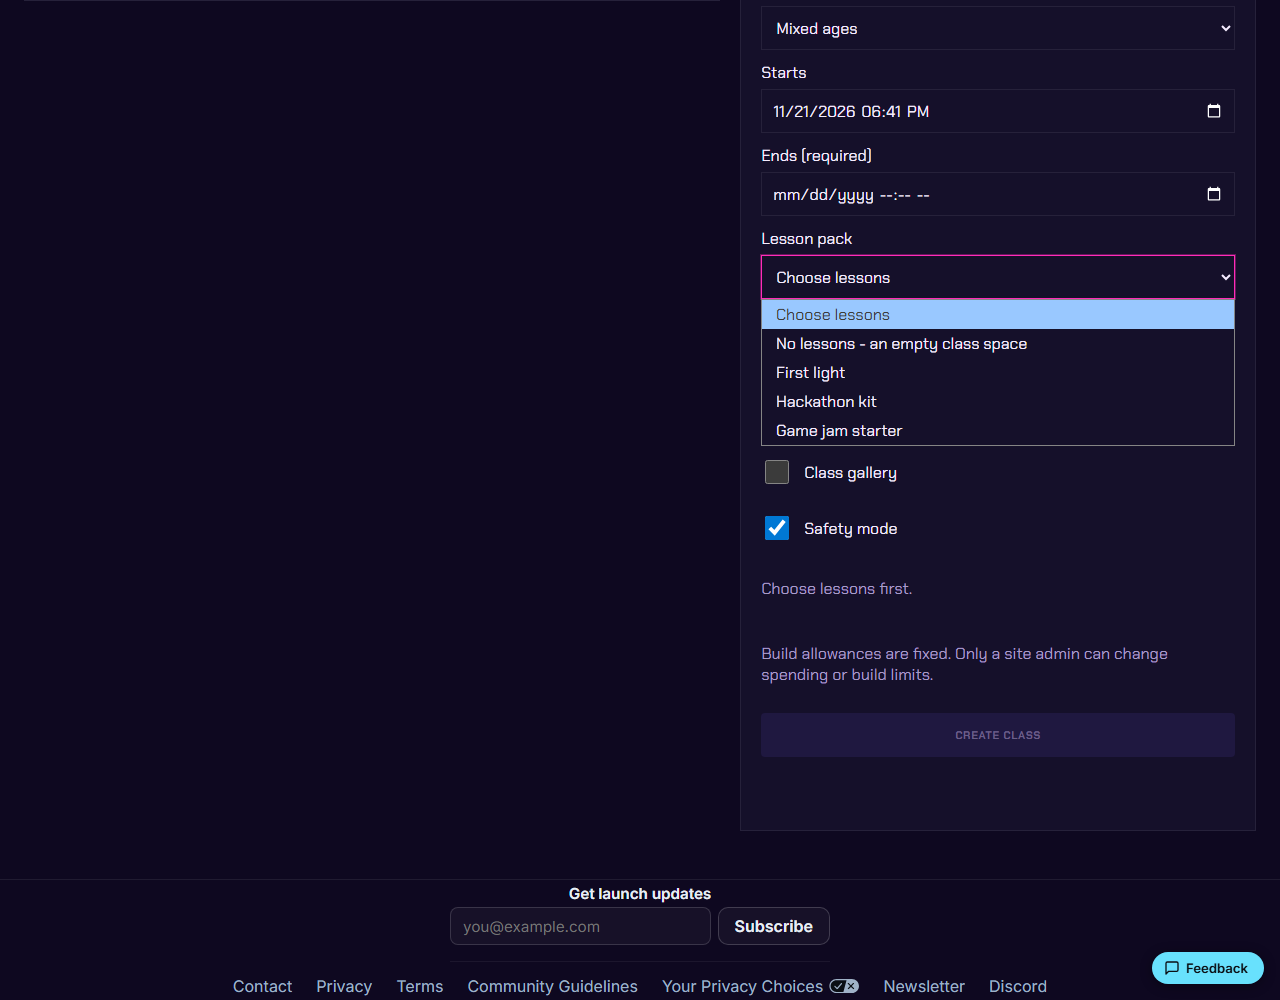
Fill in the class details. Lesson pack starts on Choose lessons; choose a pack or No lessons - an empty class space, then use Create class.

Step 6 - Add co-hosts (optional)
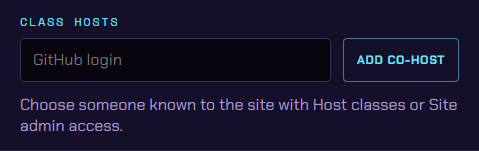
The person who creates a class can add co-hosts: other people who help run it. Under Class hosts in Class setup, enter their GitHub login and choose Add co-host. A GitHub login is the username on their GitHub account. Choose someone who has signed in to the website and has hosting access.
Lesson packs
A lesson pack is a set of starting projects and lesson steps. Choose one when you create the class.
| Pack | What students make |
|---|---|
| First light | Start with a glowing light, make an app of their own and play a game starring a creature they drew. |
| Game jam starter | Reshape a ready-to-run dot game and a blank canvas around the jam's theme. |
| Hackathon kit | Borrow from three small apps: a reaction timer, a light show and a drawing toy. |
Edit your class's lessons
Prepare the lessons before students join. The editor is its own page, so you have room to work.
What the class has used
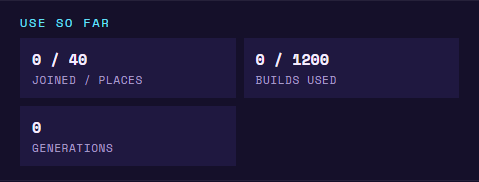
Choose Class setup at the top of the host view. Use so far shows how many students have joined out of the places available (Joined / places), how many builds the class has used out of its limit (Builds used), and how many Generations it has made. When the class gets close to its build limit, a warning appears at the top of the host view and opens this section.
Step 1 - Open the lesson editor
In the host view, choose Class setup, then Edit lessons. The editor opens on its own page. Choose Back to class controls to return to the host view.
Step 2 - Make your own copy
Choose Edit a copy of these lessons if you have not made a copy for this class.
Step 3 - Change a lesson step
The step list is on the left. Choose a step to open it. One step is open at a time. On a smaller screen, the step has tabs instead: Text, Code, Notes, Checks and Steps.
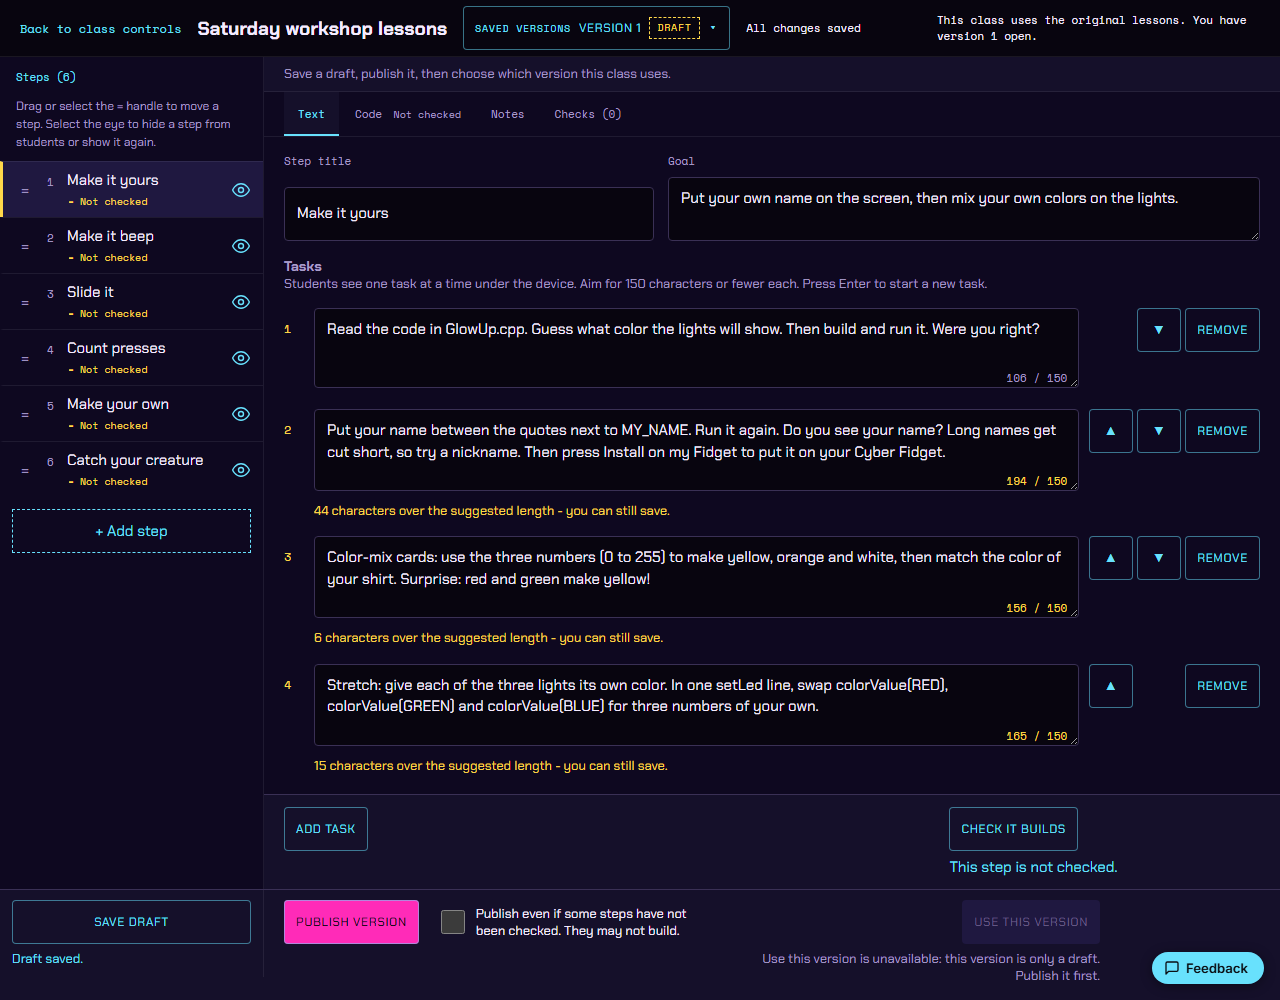
Students see one task at a time under the device, so each task is one row. Each row counts its characters. Keep a task to about 150 characters or fewer so it fits on the student's screen without scrolling. This is a guide, not a limit: you can still save a longer task.
- Add task (or Enter) starts a new row.
- The arrow buttons move a task up or down.
- Remove deletes a task. Choose Undo to bring it back.
- Pasting several lines splits them into one task per line, up to the five-task limit. If some lines don't fit, a message says how many were left out. Undo reverses the paste.
- A step needs 2 to 5 tasks. Buttons that would break this are turned off, with the reason beside them.
Step 4 - Check it builds
Choose Check it builds, below the step, to check the step's starting code. Check each step students use. If a check fails, fix the code and check again.
Step 5 - Save a draft
Choose Save draft to keep work in progress. A draft is a saved copy you can keep editing. A message beside each button says what happened.
Step 6 - Publish a version
Choose Publish version when the lessons are ready. A version is a saved set of lessons. The checkbox Publish even if some steps have not been checked. They may not build. lets you publish without all checks, but those steps may fail to build. On a phone, choose Details beside Publish version to see which steps are unchecked and to find this checkbox.
Step 7 - Use the version
Choose Use this version to select that published version for this class. Publishing alone does not change the class's lessons.
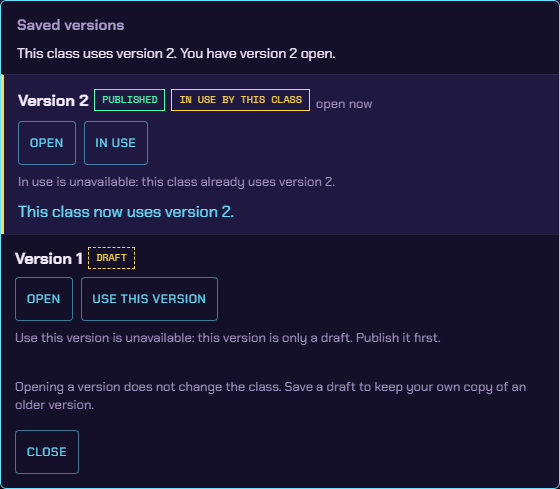
Saved versions, at the top of the editor, lists your drafts and published versions and shows which version the class uses. Open loads a version into the editor. Opening a version does not change the class.
| Field or control | What it changes |
|---|---|
| Step title / Goal | The step's name and what students aim to do. |
| Tasks | The tasks students work through, one at a time. |
| Starter header / Starter code | The code students start with for this step. Check it again after editing. |
| The eye beside a step in the step list | Hides the step from students, or shows it again. The step stays in your copy. |
| Things to say | Private guide notes for teaching this step. |
| Stuck tips - one per line, as problem - what helps | Private guide notes for helping students. Write each problem and its help on one line, separated by -. |
| Saved versions | Opens a saved draft or published version. |
Guide notes are for class hosts only. Drawings stay as they are in this version; the lesson editor changes text and code.
Update a running class
Once a class has started or a student has joined, Saved versions offers Update the running class instead of Use this version (or Go back to version N for an earlier one). It opens a check first; nothing changes until you confirm.
If you only changed text, such as a step title, a goal or the tasks, the check shows the current text beside the new text. Choose Update the running class to apply it. Students see the new text right away; their code is not changed.
If the version adds, removes, moves or hides a step, or changes starter code, Update the running class is unavailable. The check lists each change, with Open step N beside steps you can open.
A class keeps its lesson version once it has started, or once a student has joined or saved work, until you confirm an allowed text update. You can still prepare other versions in the editor, but changes to steps or starter code cannot be applied to that class.